This is the third in my series of lists detailing my gripes and wishes for Adobe Premiere Pro. To see the previous list and a record of the items that got checked off the list with the original release of CC, take a look at the Adobe Premiere Pro CS6 to CC Scorecard, which I will also continue to update with each CC update.
Update October 15, 2014
The list portion of this post is current through Premiere Pro CC 2014.1 (8.1). I have placed check marks and notes next to items that have been fixed since the initial release of CC.
Premiere Pro CC Gripes and Wish List
-
Premiere Pro remains unstable and generally buggy

To quote C-3P0, Premiere Pro CC is “not entirely stable,” and that is putting it mildly. Although I have listed a number of specific bugs in this list, I don’t have time to keep up with all the glitches that occur on a regular basis.
Improvements have certainly been made since I first started with Premiere Pro CS 5.5. Adobe has in fact been hard at work squashing bugs, but they really need to revamp the code from the ground up, at least for the Mac version. Even though Premiere Pro for Mac had long existed when the FCP X launch debacle gave them an opportunity to get back in the game, Premiere Pro CC for Mac still runs like an app that was ported from a Windows version.
Just as disappointingly, it seems that whenever a new feature is added, it almost never works correctly out of the box. You expect new features to require refinements, but in Adobe’s rush to keep up with Apple’s innovations, Adobe has a tendency to tack on features that are not yet ready for prime time, some examples being automatic Auto Sync and Master Clip Effects. They can’t seem to get anything right with merged clips, and even basic use of subclips continues to be a horrendous mess in CC 2014.1.
Crashes have been occurring less frequently with each release — but they are not uncommon. The first time you see the message that Premiere Pro has encountered “a serious error” and has to shut down, you assume from the tone that it is a rare circumstance and that emergency responders have been notified, but I have witnessed it many times across a variety of machines. It’s polite of Premiere to give the heads up that it’s about to crash, but it could at least be more specific.
When these problems occur, I find myself Googling “what’s new in FCPX” to see if Apple has rectified more of my original, deal-breaking gripes. Fortunately for Adobe, Apple’s bizarre terminology alone (Events? Libraries? Projects within Events? What?) is enough to keep me crossing my fingers that Adobe can right the ship.
-
Keyword collections (or why deleting clips from bins shouldn’t remove instances from sequences)
I like bins. I liked the physical bins during my film school Steenbeck days, and I liked the continuity of that paradigm in the first 7 versions of Final Cut. My comfort with them is one of the reasons I made the move to Premiere, but the fact is that Final Cut Pro X (the primordial version of which was appropriately called “First Cut”) has jumped far ahead of Premiere when it comes to metadata-driven clip organization.
Premiere can store plenty of metadata, but keyword collections make FCPX faster, more versatile, and better suited for file-based media when it comes to labeling and finding clips. (It’s unfortunate that Apple chose to stick with those awful iMovie-style “Events”, but that’s a gripe for another list!)
Premiere clips are organized around the idea of “master clips.” A master clip is created for each imported source file. When an “instance” of a master clip is added to a sequence, it stays somewhat linked to the master clip. I say “somewhat” because there isn’t much you can do with the master clip that actually takes advantage of the link. Changing the name does not change the names of instances. You can’t attach effects, modify audio settings, or adjust edit points. There is no equivalent of FCPX’s excellent Timeline Index.
There is definitely one thing this system prevents you from doing. My biggest gripe with the way master clips are handled is that you can’t delete a clip from a bin if an instance of it is being used in any sequences, unless you drop it from those sequences. This is a huge problem for me because I frequently create temporary bins for copies of “maybe” clips or “unused” clips.
In FCP7, you can delete a clip from a bin without affecting any sequences. In FCPX, you can just remove the keyword, clearing it from the collection. So it drives me insane when I try to delete a clip from a bin only to get a warning that it can’t be deleted because an instance or instances of it are being used in a sequence or sequences. I want to remove the clip BECAUSE I’ve already used it.
As far as I can tell, the only advantage the master clip system affords is the ability to click on the clip’s little orange filmstrip icon (in thumbnail view) and see which sequences contain instances of that clip. That’s a nice feature to be sure, but given that I often have over a hundred versions of a sequence by the end of a project, all containing instances of the clip, it’s not as helpful as it sounds.
The system completely falls apart when copies of master clips are added to other bins, which is precisely how I organize my clips. For example, I’ll drop copies of the same clip into bins labeled “b-roll”, “close-ups”, “opening montage”, “confidence man #2”, etc., etc. If I use one of those copies in a sequence though, the copies in other bins give no indication that the clip has been used.
At first, I thought the solution was simply to allow clips to be orphaned in the timeline without a corresponding master clip. That was the FCP7 way and it would be an improvement. But with the sheer number of clips per project we deal with in the age of digital cameras, Premiere’s Project panel needs a complete overhaul.
My suggestion would be to either adopt a system similar to keyword collections in FCPX (“smart bins”?) or come up with another modern solution.
If they’re going to stick with master clips, than they should truly be master clips with only one clip associated with each source file. All copies should be shortcuts (that can be deleted from any bin regardless of use in sequences). Master clips should be true master clips that list every time that clip has been used and allow the global application of effects (such as color correction filters).
Update: Adobe, I want to give you this one, but I just can’t. CC 2014.1 added a feature called “Search Bins.” It may sound like they took my “Smart Bins” suggestion (click the “Explanation” button above), but like the addition of Master Effects in the previous update, the implementation is as half-assed as it is overdue. Using the existing metadata structure to tag clips to get them to appear in specific Search Bins is terribly cumbersome.
Adobe needs to completely revamp clip organization. If they want to move in the direction of the keyword-fueled FCPX system, than they should go all in. A feature that is missing from Search Bins is that you can’t drag a clip into it to quickly tag it for that search criteria as you could with a more robust keyword system.
What I would really like to see, however, is a way to create shortcuts to clips, with their own in and out points, that can deleted without removing instances from the timeline. You would think subclips would accomplish this, but subclips are still a buggy mess and can’t be deleted from a bin without pulling them from all sequences (even if the Master Clips they refer to still exist).
Master Clips should be true master clips with twirl-down arrows that list each instance of the clip that is in use. This would mesh nicely with Master Clip Effects.
-
Background rendering
Until I can preview any sequence full-screen at full-res with numerous effects layers, rendering will be part of my workflow, and therefore background rendering would be beneficial.
I don’t mind dropping the playback to a lower resolution temporarily as my footage renders, but I shouldn’t have to export a sequence to preview it at full resolution.
Newer, more demanding codecs, with resolutions beyond 4K, will continue to come along just as quickly as hardware advances. Right now, Adobe’s solution for editing some forms of raw video, such as CinemaDNG, is to use a proxy format. What? This completely upends their sacred, no-intermediate-codec ideology.
Also, conforming to a high-quality codec via background rendering has the potential to improve the process of getting sequences out of Premiere and into third party software such as DaVinci Resolve.
There should be a choice in the way that background rendering initiates. Per the user’s preference settings, background rendering should start: automatically (instantly), only through manual initiation, or during idle time.
All of the above only scratches the surface, because the real potential of background rendering lies in combining it with an export format. Put another way, background rendering plus smart rendering would be awesome. Let’s call it smart background rendering.
Adobe made a very important upgrade to smart rendering in CC. “Use preview files” can now utilize smart rendering for Apple ProRes. This is huge, because currently in Adobe Premiere, if you need to adjust even a single frame of your sequence, you then have to re-export the entire sequence unless you have already rendered into a smart rendering-enabled format. For longform projects, the time it takes to re-export projects after minor adjustments to sequences is a major drawback.
By adding ProRes smart rendering, Adobe is actually acknowledging that rendering as you work is a legitimate Premiere workflow. Of course it is! It can save substantial time when exporting. Although it would also be nice if there were some sort of indication next to the “use preview files” option to let you know, with certainty, whether or not smart rendering is available for the currently selected preview codec.
Move rendering into a background and idle time process, and Adobe Premiere can offer the best of both worlds: Get cutting immediately, without transcoding, but save huge amounts of time at the tail end with much faster exports.
For much more on this topic: Why Adobe Premiere Pro needs background rendering
-

Capability to open multiple projects simultaneously
Maybe if we say, “pretty, please?”
Update: Adobe added the ability to import assets and timelines from other projects some time ago. I’ve been hesitant to check it off of the list because it would still be nice to be able to work on more than one project at once without having to re-load all the media. However, the most common reason for opening multiple projects is probably to copy over assets or sequences, in which case, the Dynamic Link project import is actually a more powerful feature. I’ll give it the green check mark.
-
Clicking to new playhead position shouldn’t stop playback
If you move the playhead during playback, it should continue to play from that spot after you release the mouse, not stop there. This isn’t a minor thing. It’s the way I audition cuts.
If this would bother long-time Premiere users (if such a thing even exists), make it a preference.
-
Really annoying cut selection behavior
Clicking near a cut with the trim tool highlights it in such a way that it blocks other edit tools, such as the ripple edit tool, from working on the edge of the adjacent clip. You have to unselect by clicking somewhere else in the Timeline.
This annoying selection also occurs after adding a transition with a right-click selection
. -
Fine control over trim adjustments without having to zoom in
Holding down shift would be a good option to allow adjustments in single frame increments at any zoom level.
-
Color correction shape mask
In cleaning up the 3-way color correction effect in CS6, Adobe took my advice almost to the letter. (Yes, I take full credit!) They put the most important adjustments up top and replaced the confusing highlights/mid-tone/shadows drop-down selector with three dedicated wheels.
However, a simple shape mask is sorely needed. I find masks are much more useful and ultimately faster than relying on shaky ranges that rarely nail skin tones with precision.
Basic color correction is one of the things that I think Apple got right with FCPX. SpeedGrade and DaVinci Resolve are great for big projects, but I shouldn’t have to leave the NLE for color correction as often as I currently do.
Update: As pointed out by Kevin Monahan of Adobe in the comments below, the new Masking and Tracking function in 8.1 can be used for color correction and much more.
-
Remember size, position, and sort settings of bin windows
It’s hard to believe they haven’t fixed this yet. When you double-click a bin, it always opens in a small, default-size window and loses the last used sort settings.
-
Hide mouse pointer in full screen mode
It’s the details, people. Pretty basic.
-
Thumbnail images/show frames cache
In my original CS5.5 wish list, I called this a bug because I figured there was no way it could be intentional behavior. After two major updates, I now realize that it’s not a bug. It’s just poor implementation.
There is no persistent cache for thumbnail images in the Timeline. The images get recreated every time a project is opened.
This is also the case for bin thumbnails, although that may have something to do with hover scrub.
In Final Cut Pro 7, you could set the thumbnail image disk cache size, and I would set it high enough that I could go back to a project months later and still have thumbnails load instantly as I scrolled through the Timeline. The only real limitation was the memory setting for the cache, which had to stay pretty low in a 32-bit app, but that shouldn’t be a problem in a 64-bit app.
If you set your Timeline for continuous thumbnails, Adobe’s behavior is extremely annoying in a long sequence. It slows you down. I understand that the thumbnails may have to regenerated after changes to track size or as clips are adjusted, but a RAM cache already exists (or else thumbnails would get regenerated every time you scrolled, which is not the case). So save it to disk! It won’t take up much space.
Also, it should cache thumbnails at a larger size so that they don’t have to be recreated when track heights are adjusted.
And finally, thumbnails should continue to be created even when the Timeline is playing.
-
Up-arrow/down-arrow should go to in/out of clips in Source Monitor
The up and down arrow keys currently do nothing in this window, which is inconsistent with the behavior in the timeline and inefficient, since my fingers are often already on the left/right arrow keys going frame by frame. In other words, the up and down arrow keys should behave the same way as shift-i and shift-o.
-
Clear indicators that default effects have been adjusted in Effects Controls pane
I’m talking about “Motion”, “Opacity”, and “Time Remapping.” Clips in the Timeline now sport an “Fx” indicator that turns orange when effects have been applied, but better indicators need to be added to the Effects Controls pane itself as to which specific parameters have been adjusted.
-
When clip is double-clicked in Timeline, playhead position in source viewer should match Timeline
I really miss this from FCP7. For some reason, it works in Premiere the first time you double-click a clip, but never again. Match Frame opens a different instance of the clip, when it’s working, that is. Match Frame for merged clips is broken in CC.
Update: Finally! This feature is included in CC 2014.
-
Simpler way to place a marker on a selected clip
It’s possible to set up a keyboard shortcut for “Add Clip Marker.” I have chosen control-m. This works, but it would be much more intuitive to have “m” mark any selected clips at the playhead.
Also, Add Clip Marker is extremely buggy with merged clips. It doesn’t always work and sometimes even causes Premiere to freeze up, requiring a Force Quit. This may be related to the fact that Match Frame for merged clips is broken in CC as well.
Lastly, Clip Markers are not visible on video tracks that are collapsed, which is odd, because they do show up on collapsed audio tracks.
Update: Ability to apply markers directly to clips was added in CC 7.2, which is nice, but Clip Markers still aren’t visible if a video track is collapsed, which is very annoying.
-
Better markers for sequences and clips
They added more functionality in CS6, but they should include colors and more keyboard shortcut controls.
Update: Colors added in CC 8.1.
-
Moving a clip’s video track to up or down should move audio track to match
Aside from just being more logical, it’s currently way too easy to accidentally overwrite the audio of other tracks while sliding clips, and it’s a complete pain in the ass to get the audio back once that happens.
-
Copy and paste transitions
Update: Added in CC 7.1. Better late than never.
-
Fix waveform syncing, allow merging of multiple clips at once, and trim excess audio/video
Theoretically, CC makes it possible to automatically sync dual-system audio while creating merged clips, but it has yet to work for me. Others have reported mixed results.
It’s also very unfortunate that you can only merge/sync one clip at a time, and even more unfortunate that there is no way to trim excess video or audio automatically.
-
Chronic audio drop-outs
Audio dropouts are a nearly debilitating disease in Premiere — and have been for a while now. In my experience, it is very rare to be able to play through even a short sequence in the timeline without audio cutting out. It usually comes back after a few seconds, or if you press pause and then play again.
There is a long, ongoing discussion in the forums: Premiere Pro CC Audio Cuts Out
This has been a problem in nearly every project I’ve worked on in CC, across a variety of Macs, and even with very few layers of video and audio.
Although the dropouts can and do occur at any point in a sequence, I have noticed one pattern: They ALWAYS occur if there are speed changes applied to the video.
The most frustrating and surprising thing is that fully rendering the video doesn’t offer any improvement (regardless of codec).
I’ve tried converting compressed audio tracks to wav and aiff. I’ve tried setting audio to render along with video. No joy and no fix.
-
Rendered clips need to be re-rendered after closing and re-opening a project
Just about every sequence has a handful of clips that just refuse to stay rendered, even when no adjustments are made anywhere in the timeline between saving the project and re-opening it.
-
Fix Match Frame
As well documented in the forums, Match Frame is broken in CC. With merged clips, it matches the wrong frame if it does anything at all.
Update: This appears to be fixed in CC 2014. Considering the severity of the problem, it would have been nice to see it addressed in a point update. That was supposed to be the benefit of the Creative Cloud subscription benefit after all.
-
Match Frame should follow clip selection, not track selection
Adobe has largely, and wisely, replaced track selection at the head of the timeline with direct clip selection for a number of functions, but they don’t seem to be able to let go completely.
Update: Why is Adobe fixing the track selection foolishness one function at a time? I don’t know! But they have finally heeded my suggestion for Match Frame functionality in CC 2014.
-
Color labels in Project pane should change the appearance of the actual text
The FCP way was much more useful. The color boxes in a separate column all blend together. They don’t allow me to really highlight clips or make much use of color coding at all. Also, what’s with the default color names? Righ-clicking on a clip gives you a list of exotic names without any visual indication of the label’s color.
-
Bin effects
I believe the Project pane needs to be overhauled as I explained regarding the need for keyword collections. It should be possible to add effects to clips in bins or keep effects on clips added to bins from the Timeline. It would also be nice to be able to group effects together in bins for a specific project. The effects list pane is better suited for global collections.
-
Project browser should auto refresh/sort
After renaming a clip, you have to click on the column name (twice), to get it to sort.
-
Project pane forgets last view settings when opening a project
It has a tendency to jump into thumbnail mode even if the project was last saved with it in list mode.
-
When dropping a directory from the Finder into the Project pane, keep the directory structure (subfolders)
Update: Added in CC 2014.
-
Add user defined list of favorite folders in Media Browser
And let us set the default directory.
Update: Added in CC 2014, although I would still like to be able to select a default directory.
-
Show number of frames being adjusted during keyframe adjustments
-
Footage auto-analysis: shot recognition, color correction, and color match
If only Apple had just added these features and others to the FCP7 framework instead of reinventing the wheel and taking the train “off the tracks” in the process.
Adobe can do it better by using smart folders in addition to the traditional bins that we know and trust (anything besides those dreadful iMovie-style “events”).
-
Instant effects previews
There has to be a quicker way to preview effects, perhaps along the lines of the Lumetri Looks preview thumbs (minus the guy with the mohawk). This is definitely an area where FCPX has jumped ahead.
-
Audition multiple takes
This is a sweet feature in FCPX, especially when presenting options to clients. Steal it.
-
Better “Match Sequence Settings” on export
It should be possible to click “Match Sequence Settings” and then make changes to individual settings. Instead, it’s all or nothing and locks you in to the Preview file format. Un-clicking this option just resets everything.
Interestingly, if you choose the H.264 format, you can select a “Match Source” preset. This is needed for all formats.
-
Remember last used setting of export source range (or default to “entire sequence”)
-
Vertical scrollbar in Timeline is always visible, even when not needed
Sloppy.
-
Keyboard shortcuts: button to reset to default
-
Cursor icons for tools are too big and crude
It’s surprising that such a fundamental element of Premiere is still so unrefined. The cursor icons for the various editing tools are too big, too imprecise, and just ugly. The trim tool and the ripple tool should have different shapes that indicate their function, not just different, non-semantic colors.
Update: “Leaner trim icons” added in CC 7.1. That’s a nice improvement, but the trim and ripple tools should still have different shapes rather than just different colors.
-
Tool tips block mouse actions
They actually get in the way when moving clips between tracks, even if other kinds of tool tips are turned off in the preferences.
-
Copy should always be option-drag on a Mac
Always. Copy is currently command-drag in the Project panel.
-
Scrolling in Effects Controls pane screws up drop-down menu settings
Sometimes I think no one at Adobe has every actually used Premiere with a Magic Mouse, but here’s a chance for Adobe to fix a problem that FCP7 shared: When you scroll up or down in the Effects Controls pane, effects with drop-down menu settings twirl all over the place if the mouse happens to float over them. It’s very easy to throw settings into random disarray without even realizing it just by scrolling up or down the pane.
-
Scrolling over Timeline head shouldn’t affect track heights
Same general problem as above. When scrolling over the Timeline head with a Magic Mouse, while trying to just scroll the track view up or down, track sizes go all over the place.
-
Auto save: delete oldest
Rather than delete the oldest auto save file once it has reached the limit set in the preferences, auto save starts reusing the same set of file names. This makes it unnecessarily difficult to determine which file is the latest version.
-
Increase undo limit
They increased the limit from 32 to 100, but it should be higher still.
-
After an undo, playhead should return to where it was at that point in “history”
-
Ability to switch off all effects for a given track
This would allow you to edit more quickly when effects are forcing you to render after every cut.
-
Audio scrubbing without pitch change
I guess the pitch change is intended to mimic linear editors, which was fun for a few seconds, but I have a much easier time navigating dialogue with the stutter-style scrubbing.
Update: They finally saw the light. There is now a preference option to maintain pitch while scrubbing, and it’s the default setting, as it should be.
-
Border controls for still images
-
The button editor is still crappy
Getting buttons into position like solving a Rubick’s cube and there is a ton of wasted space. It doesn’t even center the buttons.
-
Enable/disable specific effect parameters/keyframes
-
Better position controls starting point and reset button
There should be a preference to make the default position 0.0 x 0.0 (as opposed to 50% of whatever the resolution happens to be), and include a reset button.
Update: They added reset buttons for all individual parameters in CC 7.1. Nice!
-
Copy/paste clip from Timeline into bin
-
Control-k should cut through selected clip(s) within the Timeline instead of using the track selection at the head
Update: Added in CC 7.1. This is much more convenient, but instead of updating one function at a time to respect clip selection, just ditch track selection all together for a consistent experience throughout the interface.
-
Faster maximum JKL speeds
Update: Added in CC 7.1. I don’t know what the top speed was before, but it wasn’t very fast. Now you can get up to 32x, which is about as fast as you would ever need to go. Well done!
-
“Esc” out of window maximize
The grave accent window maximize is a truly awesome feature. So yeah, I know, pressing it once maximizes. Pressing it again snaps it back. Don’t ever lose that behavior. But I get used to hitting “Esc” to leave full screen mode. I would consider it a personal favor if that button snapped-back maximized windows as well.
-
Save changes to current workspace (without having to retype exact name as a new workspace)
Update: “Save Changes to This Workspace” is now a menu option in CC 2015.
-
Launching with external scratch disks unavailable shouldn’t reset media cache locations after cancel
I don’t like keeping the location of the media cache and media cache database in the default locations. The files get buried in a hard to find folder within my user Library on my main hard drive, eating up valuable space. So I set the locations for an external drive. Unfortunately, if I forget to fire up that disk before launching Premiere, the cache locations get reset, even if I click “Cancel” before opening a project.
Update: This appears to have been fixed at some point, although I swear cache locations mysteriously reset from time to time.
-
Ability to cancel New Project dialogue without having to reload current project
In other words, don’t close the current project until a new project is actually started. (This would be moot if you could open multiple projects.)
-
Tabbing between panes with keyboard shortcuts should skip tools and audio levels
-
More logical clip sliding with keyboard commands
“Cmd-,” (that’s command-comma) and “Cmd-.” (command-period) should cause a clip collisions, not overwrite, because a good use of those keyboard commands is to slide a clip up to but not over the adjacent clip.
-
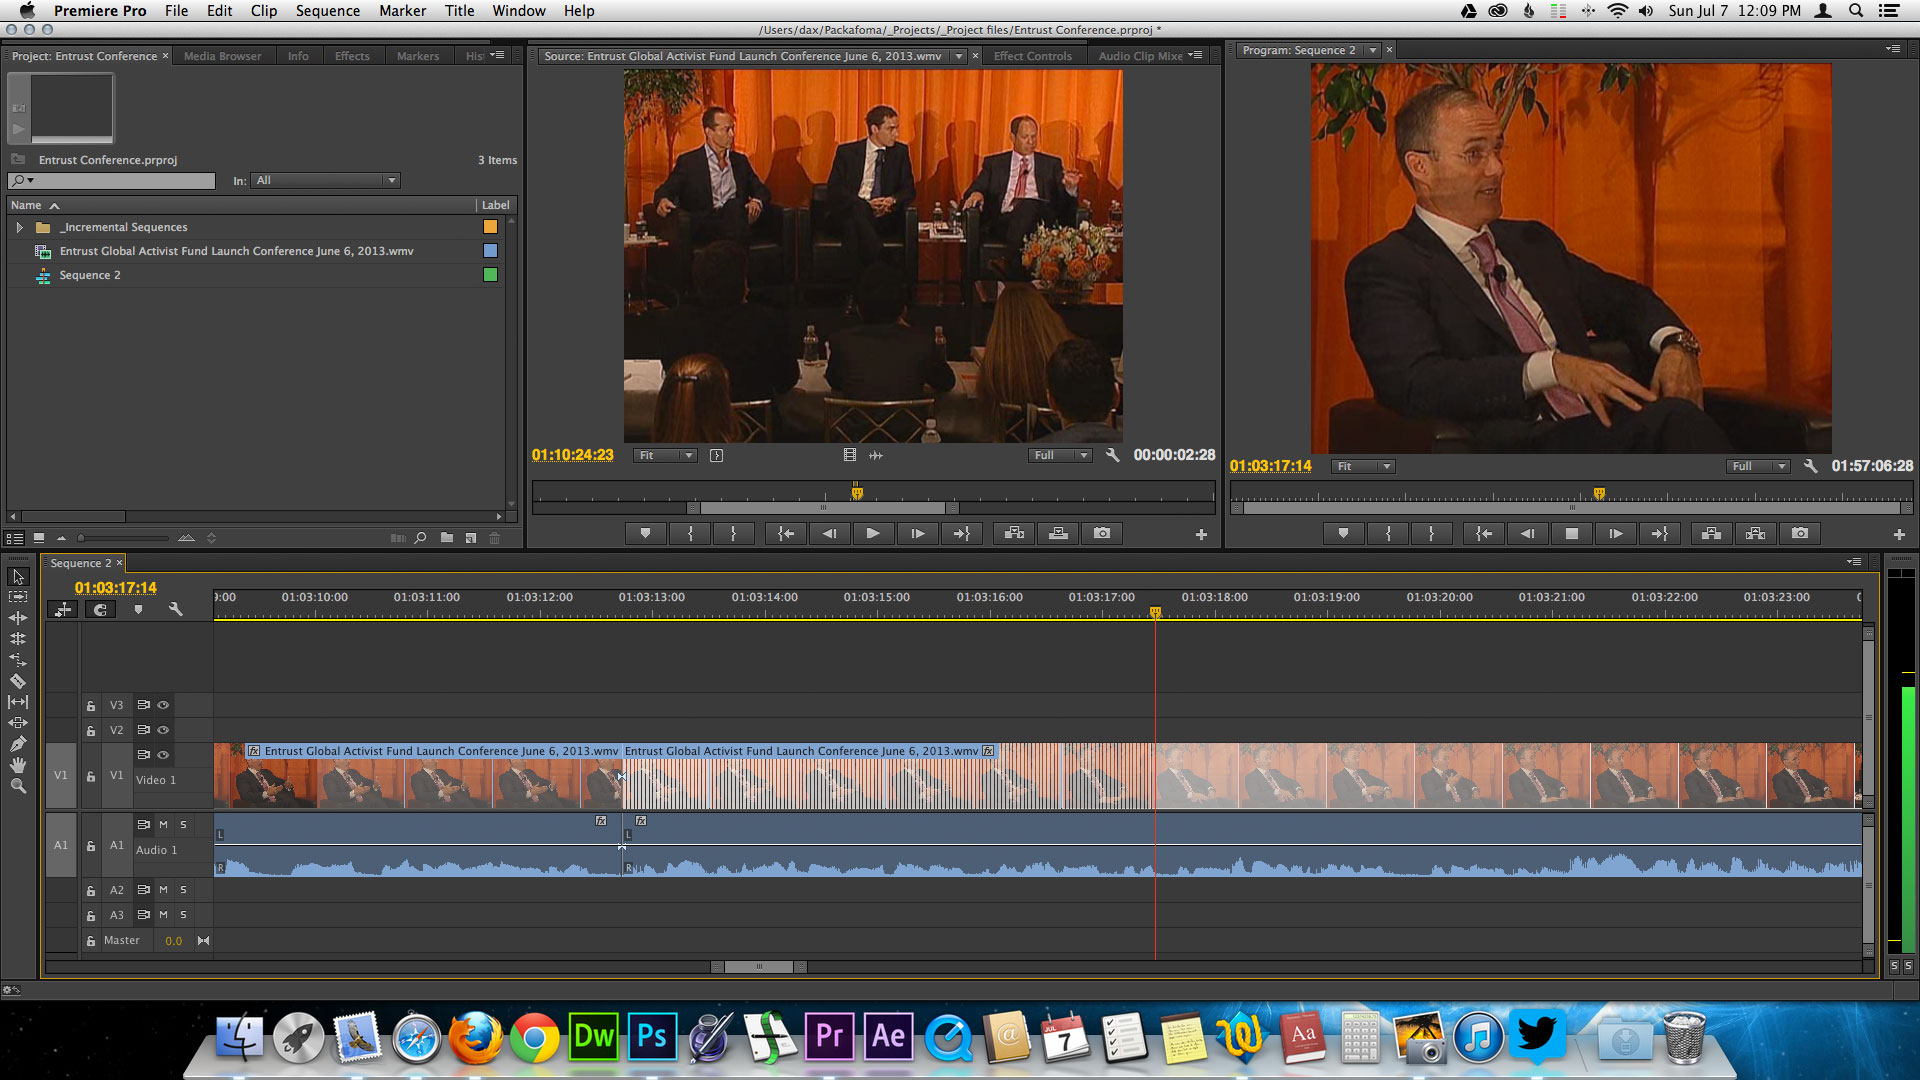
Fix weird white lines/shading
If a track is selected and a cut is made, extra white shading appears and white lines form as the playhead passes over the track during playback.
Click the image below to enlarge:
-
Clips have been known to disappear from Project pane
This has only happened to me twice. I haven’t found a pattern.
-
Speed change bug
Sometimes it won’t let you type in a speed change.
-
Automate to Sequence should respect track targeting
Automate to Sequence only seems to work on the lowest track.
-
Larger timecode display with h,m,s,f instead of colons
I think the large timecode display in FCPX is too often dismissed as eye candy, but it’s a legitimately brilliant interface element. It really helps you effortlessly keep your bearings with much less eye strain.
-
Simple slug
In CS5.5 you had to create a black matte. In CS6 they added “Black Video”, but it still involves an extra step to take it from the Project panel to the Timeline.
-
Add right-click option on Timeline tabs to duplicate Sequence
-
Enter numeric decibel adjustments for track keyframes (audio levels and time remapping)
Dragging is good for quick adjustments, but it’s nearly impossible to set decible levels with precision or consistency. Time remapping should be adjustable in the Effects pane as well, but there is no way to type in speed changes. Time remapping also maxes out at 1000% speed, whereas Clip Speed can go up to about 10,000%.
-
Many, many more effects!
Some very basic effects are missing: vignette, border, and motion blur to name a few. Adobe’s stock response to this has been to use After Effects or Photoshop. Round-tripping with Dynamic Link is a great option, but I see no reason that more effects shouldn’t be built it. Obviously, Adobe sees the benefit of including effects within Premiere or they would provide zero.
-
Many, many more looks!
The addition of Lumetri Looks is great. Keep them coming.
-
What’s the deal with that crappy-looking playhead?

I always save this for last because it has absolutely no bearing on my ability to edit, but just look at it. Seriously. It’s embarrassing. Maybe that passes for slick in the Windows world, but not on a Mac! (Hey, I had to get in one Windows knock.)
Adobe wisely dropped the even more ridiculous 2-frame animation that existed in CS5.5 and earlier. They also wisely stopped calling the playhead the “CTI.” But however you refer to it, the playhead is one of the first things a prospective user notices. That tiny, crude group of yellow pixels drags down the appearance of the entire interface.

The Three-Eyed Monster! Update: Okay. I’ll check it off the list. The flat blue playhead in CC 8.1 is an improvement — but barely!

Did I miss anything? Do you disagree about a certain function? Please let me know in the comments area.
My path to Premiere Pro CC
but it still needs some major improvements.
I switched from Apple Final Cut Pro (versions 1 through 7) to Adobe Premiere Pro as my primary NLE in 2012. Since then, Premiere Pro has improved by leaps and bounds. Yet, it remains stubbornly rough around the edges and is, to quote C-3PO, “not entirely stable.”
With CS6 and the first release of CC, Adobe was playing catch-up rather than leading in innovation (which makes you wonder what they were doing all those years), but as a daily user of many Adobe apps, I remain optimistic that Adobe will continue to make my Creative Cloud subscription worthwhile.
In all matters of life and non-linear editors, it’s easy to harp on the negatives, and I tend to be particularly sensitive to minor irritations, as well as major shortcomings, in the applications I use the most. So let me start by saying, simply, that Adobe Premiere Pro CC is an amazing piece of software.
As much as I adored Final Cut Pro from the first time I launched version 1 on my 500Mhz G4 all the way through FCP7, I no longer miss it. In fact, I don’t like when I have to go back to it now that I’ve been working in Premiere Pro for the last 2 years.
If had to name one stand-out feature, Premiere’s ability to work natively with just about every major codec is awesome. However, I’m not going to spend time talking about all the things that Premiere does right. I’ll leave that to the reviewers of major publications who play with the software for a few days and then rephrase Adobe’s press releases.
Premiere Pro CC is the 13th major release of Adobe Premiere, with many minor updates in between. So it’s a little disconcerting that the program is still buggy, still lacks attention to detail in the interface (by Mac OS standards), and is still playing catch-up to Apple and Avid in many ways.
A more forgiving take, however, is that Adobe has improved Premiere Pro exponentially since Apple handed them a gift-wrapped opportunity to fill the void of the missing Final Cut Pro 8.
I’m really rooting for Premiere Pro. I chose it over Final Cut Pro X for numerous reasons, and I’ve been paying for Creative Cloud since it’s introduction. FCPX is innovative and sexy, but it’s still version 1, as far as I’m concerned, and it has many super frustrating attributes that remain deal-breakers for me. I expect that a lot of those flaws will get addressed in version 10.1, but Apple’s lack of engagement with the professional community is also annoying. I don’t want to go crawling back. But what I first took to be great progress with Premiere, now seems like a long slog. I hope the CC updates come as rapidly as promised and introduce fewer bugs than previous updates.
Awesome, detailed list. I came from Final Cut 7 too and a lot of these things annoy me. I love 69, by the way. Gripe #69, that is! Nice enlargement. They say FCPX looks like iMovie, but the first thing I noticed when I tried out Premiere was how shoddy the timeline indicator and a lot of the buttons are.
Fix match frame, top of my list! Waveform syncing of audio hasn’t worked for me either, and there should be a way to do it as a batch.
Sounds like you might just prefer FCPX.
My FCPX wish list would be longer.
No, it doesn’t sound like that at all.
Nice list! #2 is a fantastic explanation of what’s wrong with clip organization in Premiere. I found your post because I was looking for a way to delete a clip from a bin without it stripping certain instances of that clip from my sequences. It’s a real mess when I try to re-organize clips in bins.
I haven’t tried FCPX since its disappointing release. I have to admit I’m getting excited for 10.1. I switched to Premiere because it was the most like Final Cut Pro 7, but Adobe needs to step up their game. You smart bins idea is brilliant. Thanks for taking the time!
One thing I really miss is the ability to assign more than one keyboard shortcut to the same function. Being able to do the same thing multiple ways, depending on what I’m doing, means more efficiency.
For anyone reading this in 2014 (or later), they added multple keyboard shortcuts per command a while ago. 🙂
http://blogs.adobe.com/premierepro/2014/04/thenextpremiereproccrelease.html
I follow the updates closely. Is there something that should be checked off the list?
Ah…didn’t catch which comment you were replying to when I was notified by email. Good to know. Thanks, Ben.
Sure. They just don’t make it obvious that you can… you have to click on a small space after your previously assigned shortcut.
Also, someone else mentioned wanting to search for a shortcut to see what was assigned… well you can do that too– you just have to type in the shortcut. So to search for what you have assigned to “Shift+K” type in “shift+k” and it’ll be revealed.
That’s a great tip, Ben. Thanks again!
I love this website. Thanks for givin video editors this place.
My wishes:
1-Warp Stabilizer analysis information should be outside of the Premiere Pro project file. Like Final cut 7 does with smoothcam. Right now it grows the project file size.
2-The GUI font size should be adaptable
3-It should have an audio meters with at least 8 bands
Anyway its still a confortable and very good software. Cheers Adobe
Thanks for the comments, Alejandro. I strongly agree with #1. Using Warp Stabilizer causes project files to become enormous. The huge project files take longer to load, much longer to save (including auto saves) and slow down the whole system. And if you back up your primary hard drive to the cloud as I do (I ❤ Backblaze.), it slows down that process as well.
I try not to add the Warp Stabilizer effect until the project is nearly complete for these reasons, but doing so is not always practical, because sometimes the only way to know if a shot is usable is to see it with stabilization. Plus, clients find shakiness distracting even in rough cuts.
It would make more sense to save stabilization information to cache files.
One simple thing that doesn’t seem to work for me is copy & paste when in the export browser… so if exporting an omf of mp4 i can’t copy the sequence name and paste it into a new folder, like i can with every other app on the mac!
Love the list! I’ve been dealing with the FCP switch lately and I wanted to recommend a few more to your list. Keep in mind, a lot of these are a result of working in very large projects and multicam and this list does not include bugs/buggy-ish annoyances:
-Should generate peak files when waveforms are requested, not when opening a project or importing. If I import a folder of music with hundreds of tracks, I have to wait while it generates waveforms, when I may never use or even open some of the tracks. I’d rather just wait 2 seconds the first time I load an audio file into the source window or sequence.
-I’m all for customization capability, but there are way too many ways to modify audio channel routing, especially when using multi clip sequences or nested sequences. Clip level; track level; sequence settings level, nested sequence level, master sequence track level; master sequence settings level…
-Media Cache and preview files should go into project-specific folders in the finder. If you want to clear the cache and you use one scratch location for everything, you have to delete the cache for all projects.
-Rendering audio when using multi clip sequences. Why oh why does it take 30 minutes to render only the audio of a 20 minute cut?
-I would like the Ripple Delete to have an alternate “close gap” capability similar to FCP, as in close the gap in a sequence taking all tracks into account, not just the track I right-clicked on.
-This whole deleting-clips-in-the-bin-deletes-the-associated-clip-from-sequences thing is insanity.
-Copying and Pasting in the timeline should paste to the same track level it was copied from.
-To select multiple clips in the timeline you have to hold Shift, but to select multiple effects in the Effects Editor you have to hold Command.
-Markers should be searchable from the Project Panel, and the Find feature! What’s the point of detailed markers if I can only search within one clip? I want to find all instances of what I’m searching for.
-There should be an option to NOT have audio keyframes defaulted ON!
-You have the option to display Creation Date in the bins, but you can’t choose to sort the clips by that column.
-Need need need to be able to either A: paste markers from a clip to a nested sequence; or B: Be able to display markers from clips within a nested sequence on the nested sequence! I had a situation where my producer put detailed markers on hours and hours of A-Cam clips, then we multicam’d with B-Cam, only to find when I load a multi cam into the source window or into a sequence, I can’t see the markers anymore. Which means to use his markers I have to frame back twice to the A-Cam clip itself.
-Should have control over what you what rendered in a sequence, similar to FCP. (don’t render green, do render yellow, etc)
-In the keyboard shortcuts window, you should be able to “reverse search” by keyboard shortcut’s keystroke. Maybe I just want to quickly find out what a certain keystroke is set to do…
-Also, the Keyboard Shortcuts panel should have a “Save” AND a “Save As…” As it is, if you want to UPDATE your keyboard shortcuts (which is 99.9% of the times I ever change them), you have to type in (and remember) the name of your current preference file, and then you get a warning asking if you really want to overwrite.
-I would sometimes like the option the leave the Motion Effect’s wireframe overlay on at all times, similar to FCP, so I can just drag the video in the viewer to move a clip.
Phew! That’s about all I got for now, plus your entire list of course…
Thanks for letting me vent. I wish they would stop working on Dynamic Link and fancy new features for just one week and fix these tiny, but huge things that other NLE’s have had for years and years.
OH! And one more!!! Adobe’s Feature Request/Bug Report form should let you enter multiple requests/reports at one time!!! For me to request all this stuff one at a time, filling in name, email, etc… It’d take a week!
Ok. I’m done. RIP Final Cut…
I’m in 100% agreement with every point listed above. (some of them I hadn’t thought of)
Thanks, Markus. Lots of great additions here.
Yep, audio channel routing is a mess. My biggest complaint is this: Modify Audio Channels from the Timeline
— Media Cache and preview files should go into project-specific folders in the finder.
No doubt. That would be much better than the current hodgepodge.
— To select multiple clips in the timeline you have to hold Shift, but to select multiple effects in the Effects Editor you have to hold Command.
A very typical Adobe inconsistency, not unlike my #38
— In the keyboard shortcuts window, you should be able to “reverse search”
Yes! When choosing custom shortcuts, I would like to be able to find out what a key combo currently does.
— the Keyboard Shortcuts panel should have a “Save” AND a “Save As…”
Definitely, just like my #54 for workspace layouts
— Adobe’s Feature Request/Bug Report form should let you enter multiple requests/reports at one time!!!
Such a good point! I usually type up my feature requests and bug reports in a text file and then paste each one in. What a pain in the ass. Maybe Adobe thinks no one would have more than one feature request. I guess they’ve never actually met an editor.
I’m glad you agree about the deleting-clips-from-bins-shouldn’t-remove-instances-from-sequences nonsense. It’s my #2 complaint in my long list for a reason. It really screws up my workflow.
Adobe just announced “search bins” for the next update. It’s better than nothing and a step toward the “smart bins” that I suggested. It should allow us to tag clips with specific keywords to bin them together (e.g. “unused b-roll”). So instead of deleting the clip from the search bin when you want to remove it, you could just remove the keyword. But much like the recently added master clip effects feature, search bins are an overdue feature with half-assed implementation. I’m tired of patches. They need to completely revamp clip organization. If they want to make it more like the keyword-fueled FCPX system, than they should go all in, but I would rather they just allow you to create shortcuts to clips, with their own in and out points, that can deleted without removing instances from the timeline. Then they should also have true master clips with twirl-down arrows that list each instance of the clip that is in use.
That thread on Audio Channels made my head hurt. I just prefer to ignore the problem and make everything Adaptive tracks. Period. Then sometimes use sub-mixes to send a mono lab to both left and right, etc.
We’ll see what happens when I go to mix!
And I find new issues every day.
The latest ulcer creator: The Title Tool (while I love the amount of control I have over the text and stylings), I’m going insane with all the accidental text changes when I learn the title card didn’t fully “duplicate”. If I wanted a “parent” title card, I’d nest it and duplicate that! As it is, every time I Alt+Drag a lower third, I have to zoom in to read the clip name and make sure the ‘Blah_blah_title_copy123834764’ incremented up, lest I change it and not notice it changed the previous instances of the lower third until I’ve already posted the client link! I know it has that button in the title tool to duplicate based on the current theme, but that requires remembering a backwards logic! And as a general life-rule, I try to forget things that are WRONG.
-Why can you only have a certain number of label colors? Why limit it at all? If I want to color code clips with an OCD, 100-color scale from cold to hot, then let me make my life a organizational hell.
-Why do they make track mattes so complicated? Why is it an effect, and not a blending mode? Why is there a “Set Matte” effect and a “Track Matte Key” effect, and what’s the difference? If it is going to be an effect, then why does the matte need to be in the sequence? Why not just drag+drop load it into the effect? And if it must be in the sequence, why can’t the effect automatically disable the matte so it doesn’t visibly cover the results until I manually disable it?
-And in the 23 years of Premiere Pro’s existence, they haven’t gotten around to writing a Matte Choker effect? Or the ability to feather a wipe/iris/slide transition (yet the wipes in the effects folder do let you)?
-Why does “Render In to Out” and “Render Selection” have to be two different things? If nothing is selected, then render in to out. If something is selected, render that. And why not the Auto Render option? If I’m away from the computer for whatever reason, then it might as be put to good use.
Alright, alright. I’m stopping. I should be working.
But seriously, 23 YEARS this program has been around! DaVinci might surpass them as a more usable NLE in less than 5…
Commenter Ben pointed out above that you can do a “reverse search” to see what function is assigned to a specified keyboard command by typing out the actual letters of the shortcut in the search box. For example, type in “shift+k” to reveal which function is assigned to Shift+K.
YES TO EVERYTHING ABOVE!
#4, please, PLEASE, PLEASE! Adobe, incorporate #4 “Capability to open multiple projects simultaneously”.
Seems to me this shouldn’t be an issue since it’s one of the strengths of FCP7.
Without this ability, I’m screwed on a daily basis. As I type, I’ve got 7projects open, some waiting on approval, some waiting on final audio, some I’m working on, etc. Importing one project into another is not acceptable in our workflow and is just an insane way to attempt to be efficient for what we do. Others I work with are in and out of multiple shows (Which have their own projects) all day and closing one to open another is nuts! (especially if the projects are large and take a while to both close and open).
I wish I knew who to suggest this to, whine to, scream at…. someone at Adobe that’s listening. The lack of this one feature will screw my work flow, both at home with my side jobs and at work with my bread & butter jobs.
One big gripe that I did not see in this list, that prevents a lot of film assistant editors from pushing to switch to Premiere, is the inability to freely organize clips in a bin while in icon view. Many editors exclusively use icon view in Avid and FCP to organize their dailies in a way that makes sense visually. Premiere by default locks those icons in to an entirely restrictive grid, with no ability whatsoever to freely organize icons in the bin’s space. Once arranged, that layout should be retained when a group of clips are selected, copied and pasted in to another bin.
This is a major deal breaker for most professional film editors and assistants in terms of even considering use of Premiere.
Very good point. Automatically arranging into a grid should be an option that can be turned off. Also, it still boggles my mind that after all these updates, when you doube-click/open a bin and adjust the size of the window, Premiere doesn’t remember the size of the window the next time you open it. It always goes back to the small default size.
Great list. I come from Avid actually. I made the change because of the after effects integration and because I believe Avid doesn’t update as much as it should. I really love the CC constant update Adobe is using. We are getting new features every 2 or 3 months.
Now with my #1 biggest gripe: Source patching shortcuts! I don’t like having to use the mouse. The keyboard is so much faster. But the way Premiere Pro works now is that you can assign shortcuts to presets. Which is ridiculous. Example: preset 1: v1, a1 ; preset 2: v1, a2; preset 3 v2 a3; etc… It should be like in avid. each source can be assign its own shortcut that you toggle on and off. I am not sure if I explained this right.
#2 biggest gripe: throw a sequence in the source monitor and be able to see the timeline (another feature i used to use a lot in Avid) But i believe this one has been righten in the last update.
#3 biggest gripe: shortcut editor. I hate the list. At least I hate the least by it self. There has to be a graphic representation of the keyboard like Avid and Final Cut has.
I am sure I have more. But can’t remmember them right now. I am looking forward to your next list update considering the lastest premiere Pro. And sorry for my english.
Hi,
Thanks for the feedback. I can address your 3 “gripes.”
Gripe #1: Source assignment presets are now available.
Gripe #2: You can open a sequence in a Source Monitor and view its Timeline concurrently. Load the sequence, then from the Settings menu, choose “Open Timeline.”
Gripe #3: I can understand why you might not like the Keyboard Shortcuts editor. Make a feature request: http://www.adobe.com/go/wish
That’s what i am saying. Presets are ridiculous because there are a lot of different combinations and each preset overrides the last one. In avid Each source and each track can be assign to a key. You press it once its selected. You press it again and its deselected. Simple. No presets. Its way simpler and more importantly its faster.
“Capability to open multiple projects simultaneously” should be updated because you can browse then import items from other projects—which is the reason that you’d want to open multiple projects in the first place. Just inspect and import via the Media Browser.
It’s even better than other NLEs because you don’t even have to open those projects to import items from them. And that is cool!
OK. I’ll give you this one. I do remember having at least one issue with importing assets from another project the first time I tried it, but I can’t remember what it was. I agree that it’s a nice feature that has benefits beyond just being able to open up a separate project.
There is still something to be said for being able to open up multiple projects that you actually want to work on without having to wait for all the media to re-load as you go back and forth, but I will check it off of the list!
Hi,
You can now arrange clips in icon view however you would like. There are even options to sort them in a pop up menu near the bottom of the bin.
Arranging the clips in the icon view has been around for awhile, what would be good is if it remembered your sort option or had the files organised by name as default rather than the user order which is all over the show. Every time I open a project i have to go and select “sort by name”.
Color correction shape mask: needs a check mark. Masking and Tracking covers this. Hope this works the way you envisioned.
Check mark added. Thanks, Kevin!
Problems with premiere I can’t believe are still around:
1. Slipping an audio doesn’t live draw the waveform:
When using the slip tool there is no visual feedback of the audio waveform as you drag. Once you release your mouse it re-draws the wave form so you have to do a lot of guess and check or defer to nudging by keyboard. It drives me insane that Premiere can’t live draw audio waveforms in 2015. Audition or any DAW has no problem with this. I’m sure Final Cut X can do it since it was written in the last 5 years. The same goes for moving any clip with audio on the timeline. It creates a ghosted copy and only redraws the actual clip when you release the mouse. That is some leftover 1990s code BS.
2. 5 up slip preview at playhead.
When you do a slip edit, a lot of times you want to match something up to the play-head not necessarily just the in or out of the clip. Premiere only provides a 4 up of the current clip in and out and the next clip in and the previous clip out. I believe avid has a proper 5 up. There is definitely some black screen real estate in this view that could fit this request. Currently my work around is to make a cut at my preferred snyc point, slip it to where i want it then delete the head or tail of the now out of sync remainder clip and then extend backwards or forwards. About 5 too many clicks. This is mega annoying when cutting music videos or trying to time something up to a sound effect etc.
3. Scale to frame size breaks the program monitors ability to do a slip edit.
If you use an oversize clip on a 1080 timeline (think 5k red to 1080p) and use the “scale to frame size” option instead of the “set to frame size” (mind you it’s weird that we have these two options in the first place just pick one) the program monitor can no longer properly display the video image. This drives me insane: See this image. http://imgur.com/muG06zS. This bug has been around since at least CS5.5 if not before.
4. No Scale to fit frame option:
If you shoot a lot of time lapses or have to use photographs of some sort, or even just a 4k DCI image in a 1080p timeline there is no default scale to fit frame option that doesn’t get rid of black bars. After Effects has been able to do this forever. Just steal it already.
I’ve probably submitted bug/feature request for all of these like 19 times but nothing ever changes.
Alpha and Luma Travel Matte in the composite/blend section. Grant it I’m still on CS5 but I haven’t seen anything regarding this being an option in the CC platform in my research. I’m in the middle of a couple projects and don’t want to upgrade or trial run until things calm down a little bit in case things go sideways, even with all the system backup options I use. The problem with the Track Matte option in Premiere is that it locks the video to the alpha matte; you move the video and the matte moves too, enlarge the video the matte enlarges too.
I do projection mapping and would use lots of alpha channels to map out the different elements of buildings or sculptures that I project upon. With FCP7 I could put the mattes on alternating tracks with the video segments on the others. I could then position the video elements accordingly leaving the matte where it needs to lie and simply change the opacity function for new clips added for each alpha element.
Essentially I would set up the mattes, change composite to luma or alpha matte and then edit each section accordingly with the video(s) I chose, enlarging, repositioning, etc. No function like that in Premiere, have to go to After Effects for that, which is super easy to enable there, however, After Effects is not a video editing program and it shows with the workflow interface.
So now I have to edit each masked section in premiere with a reverse alpha file, because for some reason when I select reverse alpha from the modify clip section I’m getting all these weird digital artifacts. At least this way I can get the composition of the video correct, and edit what I need to for that section. The problem is that doing it this way means I’m editing each section separately and then having to import things into after effects to see the timing of all the pieces together. In FCP I could see all 3-8 sections at once and edit all the sections in one timeline. But I’m determined to make the switch, because FCP7 is just gone, and I need to admit that.